You can’t use your MIDI keyboard without PC software or DAW, no matter how small it is, whether it’s a tiny 25-key controller or the best 49-key MIDI controller. One of the most popular DAWs with multiple tools and a large sampling/effects/plugins library is FL Studio. It’s software combining the DAW and sequencer functionality. You can perform multiple operations with a single or several soundtracks, combine and mix or separate them, apply effects and VST. This software is used by musicians and music producers, sound editors, and bloggers.
While FL Studio version 20 is available already, sound experts claim that the previous version, 12, is more popular due to its simpler design. That’s why here we’ll disclose how to use a MIDI keyboard with FL Studio 12.
To use the FL Studio software, you must first install it on your computer. Although the program has a user-friendly interface, the setup takes some time to be performed. Below you’ll find a step-by-step guide to connecting and using your MIDI keyboard with FL Studio.
How to Connect a MIDI Keyboard to FL Studio
- Make sure you have the proper drivers for your keyboard installed on your PC.
- If you hooked up your keyboard to a PC before (e.g. to work in another DAW), unplug it and leave the PC MIDI port (if any) or a sound card input empty.
- Turn off both the computer and the keyboard.
- Connect the MIDI cable to the MIDI port on the PC, or use an adapter to plug the cable directly to the sound card connector.
- Turn on the MIDI keyboard and the computer.
- Run the FL Studio software.
- Via the F10 key on the PC keyboard, enter the FL Studio settings for MIDI devices.
- Enter the input settings, press on the ”generic controllers”. The MIDI keyboard should appear on the list.
How to Set Up a MIDI Keyboard in FL Studio
- Check that the “Enable” button is lit with green and the “Send master sync” one—with orange.
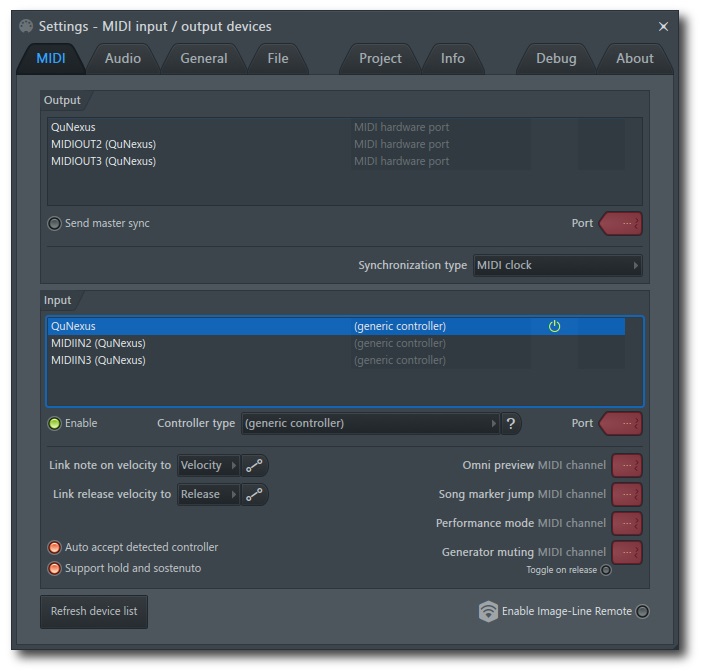
- To make the computer recognize your MIDI keyboard automatically, activate the “auto accept controller” option in the MIDI settings menu.
- Press some keys on your MIDI board to check if the signal passes through. You should hear a sound from the PC speakers.
- Deactivating hold and sostenuto, you will get a short sound from a single pressure. Leave this button orange if you want to have them while you play.
- If you want to go further in your inquiry on how to use a MIDI controller in FL studio, you can link the parameters to the keyboard knobs or keys. For that, select the parameter (e.g. “flanger”). Right-click on “flanger”, and a small menu will appear. Choose “Link to controller”, upon which a window will appear. Then, turn the knob on the keyboard you want to assign to the flanger.
- If you want to cancel the parameter linking to a knob or a key, enter the parameter window, and decrease the digits in the “Ctrl” graph to the bottom level.
How to Use a MIDI Keyboard in FL Studio
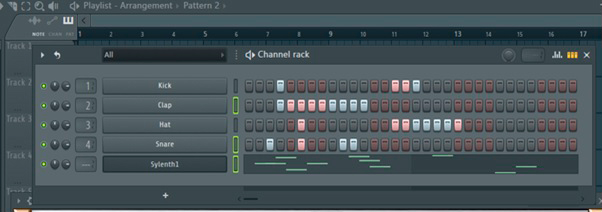
- You can choose various instruments to play in FL Studio. For that, press on the bar next to the instrument name. It will light up green.
- A Piano roll area serves for the compilation of the sound samples, and their combination. To place a sound sample into the Piano roll, choose the “Packs” menu. Then select a sample and drag it into the Piano roll area. Here you can also mix the samples, change their hold, coloration, add effects, and so on.
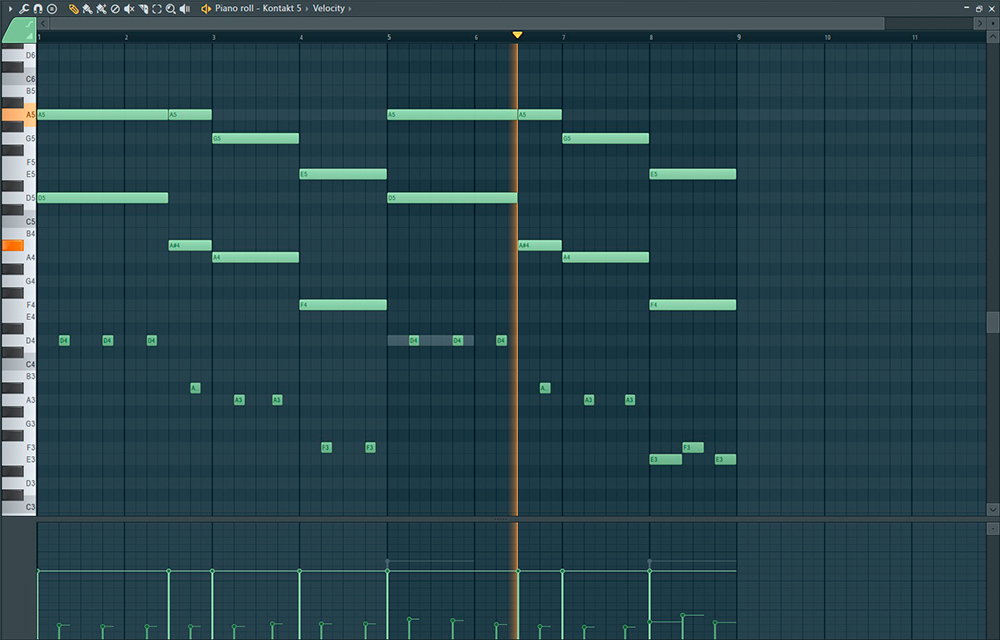
- Let’s see how to use a keyboard as a piano in FL Studio for recording. To record a playback, press the bar next to the instrument you need. Then press the red button in the top part of the interface. In the popped window, choose the “Automation & score” option, and press space on your PC keyboard. Listen to the four clicks, and start to play right away. When you’re finished, press on the “Stop” button and your record will appear in the Piano roll area

Hi everyone! I’m Thomas Moody, also known as Guitarzan.