Reaper (Rapid Environment for Audio Production, Engineering, and Recording) is a digital audio workstation with a wide range of capabilities, including recording or triggering MIDI sounds on a PC, editing, processing, mixing, and more. It runs on Windows, Mac OS X, and Linux. The good news is that it can be used with a wide range of MIDI controllers, whether you’re using the best 49 key midi controller or a more complex unit.
Reaper has become one of the most popular DAWs in recent years due to its stability and extensive feature set. One of its most appealing features is the ability to control it directly from the keyboard (or other external controllers). So, how to use a MIDI keyboard in Reaper? For that, you will need to perform proper connection, installation, and mapping.
How to Play a MIDI Keyboard Through Reaper?
First and foremost, make sure your keyboard can sync with Reaper and is fully functional so you can get the most out of this DAW. For Reaper, having a large number of pads on the controller is crucial. You’ll be able to program them to perform certain DAW functions as a result of this. Faders are also essential for adjusting various parameters.
You must read the manual that came with your unit in order to properly set up and configure Reaper. To get the keyboard to work with your computer, some models will require a driver or installer. The other models are ready to use right away. So, follow the provided instructions in the manual and install everything required, otherwise, you won’t be able to use Reaper.
Connection
The MIDI keyboard can be connected to your computer in two ways. If your audio interface has a MIDI in port and your keyboard has a MIDI out port, you can use a standard 5-pin MIDI cable to connect the keyboard to your audio interface. The second option is to use a USB cable to connect your keyboard to your computer. The last option is the best because such models use USB as a power source, obviating the need to find an electrical outlet to plug in your device. It will, of course, only work if your keyboard has a USB port.
Setting up
So, now that you’ve completed all of the necessary connections, how to use a MIDI keyboard in Reaper? For that, you will need to configure your keyboard to work with the DAW. Take the following steps:
- Open the Reaper.
- Open the Preferences window (“ctrl + p” on Windows, “cmd + ,” on Mac).
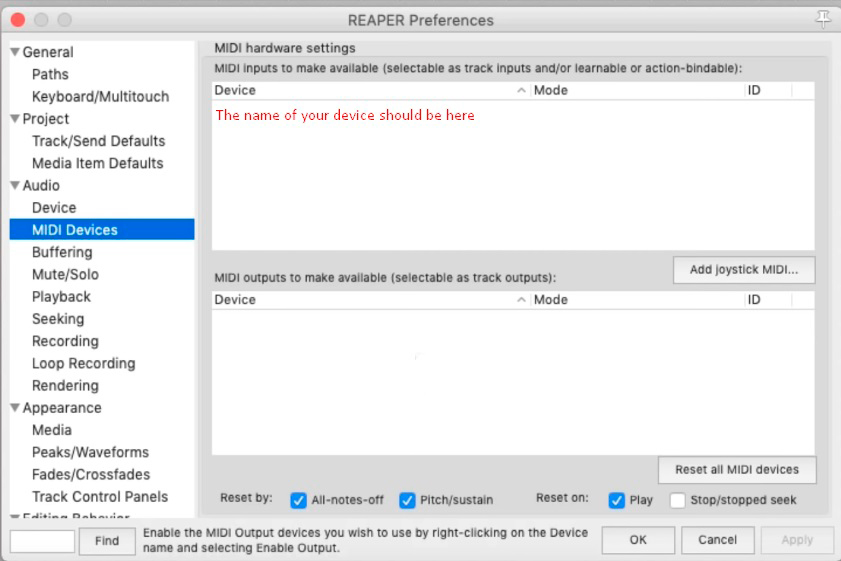
- Click on “MIDI Devices” in the left column.
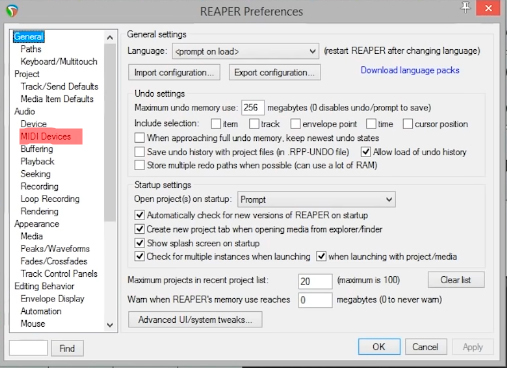
- The MIDI device you want to use should be at the top of the list. If the status is “disabled”, right-click it and select “enable input.” Then, click the Apply button.
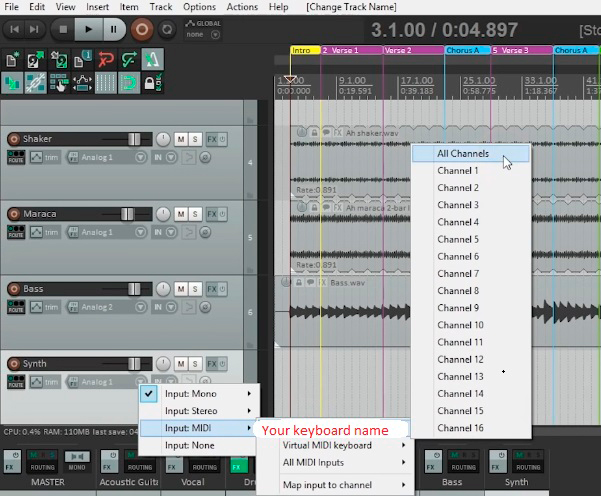
- You should try to make a new track to ensure that everything is working properly. Name your rack by double-clicking in the track area. Then select “MIDI” from the track input selector, and your device will appear as an option. If you don’t see it, it’s because the configuration wasn’t done properly. In this case, consult the manual for your keyboard.
- By selecting the name of your keyboard, you will see 16 channels available, but you should pick “All Channels”. Instead of focusing on a single MIDI signal, Reaper will now scan for all of them.
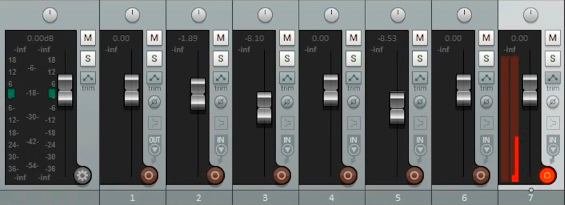
- To avoid further problems when setting up a MIDI keyboard in Reaper, make sure everything works properly. To do so, try arming the track and ensuring that Reaper is receiving MIDI data. Select your track by clicking on its name. If you see a thin red line on the right side of the meter, you’ve completed the setup correctly and can begin working with the DAW.
Mapping
You should consider mapping your MIDI controller now that you know how to use one in Reaper. Actions in Reaper can be easily mapped to hardware buttons on a MIDI controller. Some MIDI controllers map automatically in Reaper, while others require manual input. So, you’ll need to map the hardware Transport Controls on your keyboard to the Reaper Transport Controls. You should do so by following these instructions:
- The first thing you need to do is decide which Actions should be triggered by which buttons. When you hover your mouse over a button in the Hint window, it will show you the shortcut it is assigned to. Reaper can provide you with more variants that are currently assigned to the buttons. You can even assign two functions to a single button.
- In the Reaper’s menu, select “Actions” and then “Show Action List.” It will display a list of all the Actions that Reaper is capable of performing. You can quickly search for a specific Action using the Search box in the left corner. Given the length of this list, it’s a very useful feature.
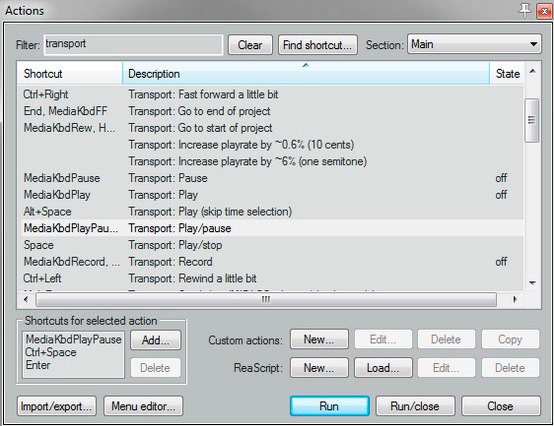
- When you’ve found the Action you’d like to use, click it and then press the Add button (it’s in the Shortcuts for selected action section).
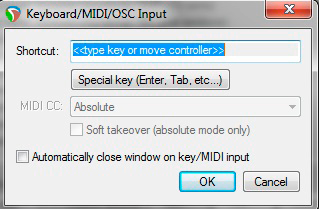
- After that, the Keyboard/MIDI/OSC Input window will pop up. The text in the Shortcut section should read “<<type key or move controller>>”. The text should change as you press the Play button on the keyboard, according to the message that was received as you pressed the button. Reaper will now begin to play as soon as you press the Play button.
- Press “OK” and make sure that a new assignment is displayed on the list. If the Reaper MIDI controller mapping has been done correctly, press the “Close” button.

Hi everyone! I’m Thomas Moody, also known as Guitarzan.