Even if you’re new to the digital music world, you’d probably heard of Audacity. This free software provides multiple opportunities and can well be used for professional instruments like a 61-key MIDI keyboard. Audacity is an audio mediator that allows you to hear your playback through connected speakers, adjust velocity parameters, apply effects, mix and separate tracks, and perform a variety of other tasks.
Though Audacity has a user-friendly interface, the settings are distributed into the different sections of its menu. Thus, knowing how to record a keyboard on Audacity USB will let you come through the connection and setup process quickly and start recording your tune right away.
How to Record a MIDI Keyboard in Audacity?
- The first step is to connect your keyboard so that the Audacity software would detect it correctly. Find or purchase the MIDI USB cable, like the Amazon Basics model. If there’s no USB on our MIDI keyboard, use the converter interface like an Uhugu one. If you use an audio interface, hook up a keyboard to the interface device with MIDI cables, and the interface to a PC through the USB cable.
- Enter your keyboard’s settings and enable the output you’re using to connect to a PC if your keyboard has multiple connectors.
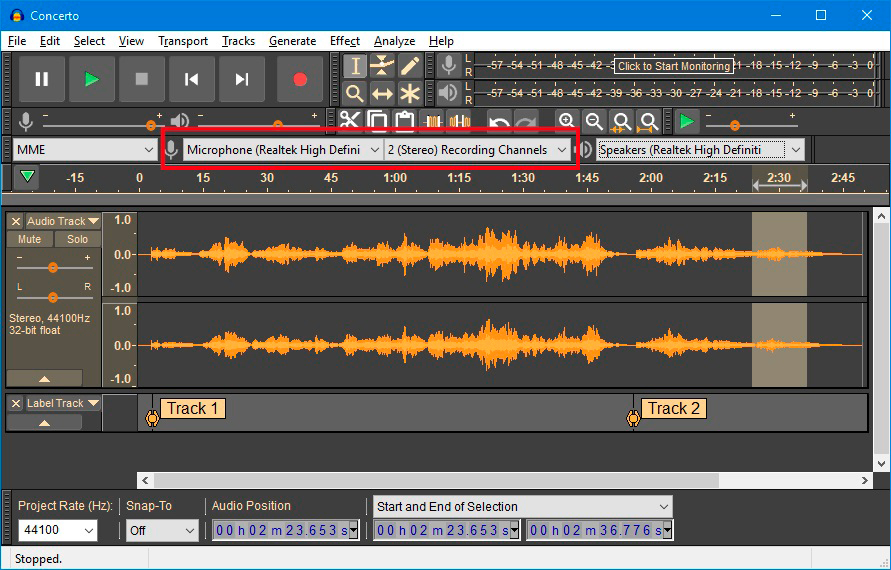
- Launch the Audacity software. You may need to perform a connection scan if it was already open before you connected a keyboard. Select the command “Rescan audio devices” from the “Transport” menu. Your keyboard name, along with the type of input you used, should appear in brackets near the microphone icon on the top panel. Restart the software if this does not work.
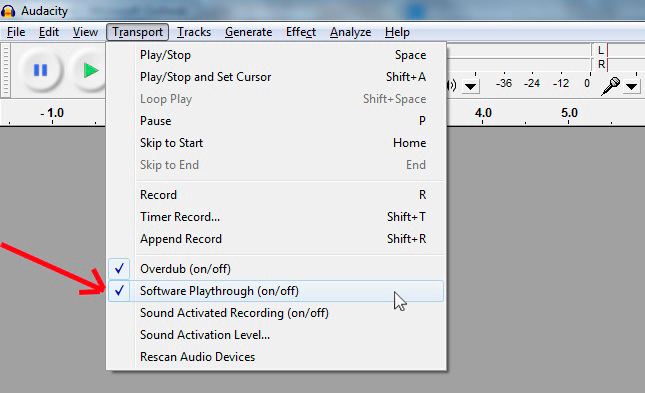
- Return to the “Transport” menu and select “Software playthrough”. If you enable this option, you will be able to hear the audio output through your computer speakers in real time.
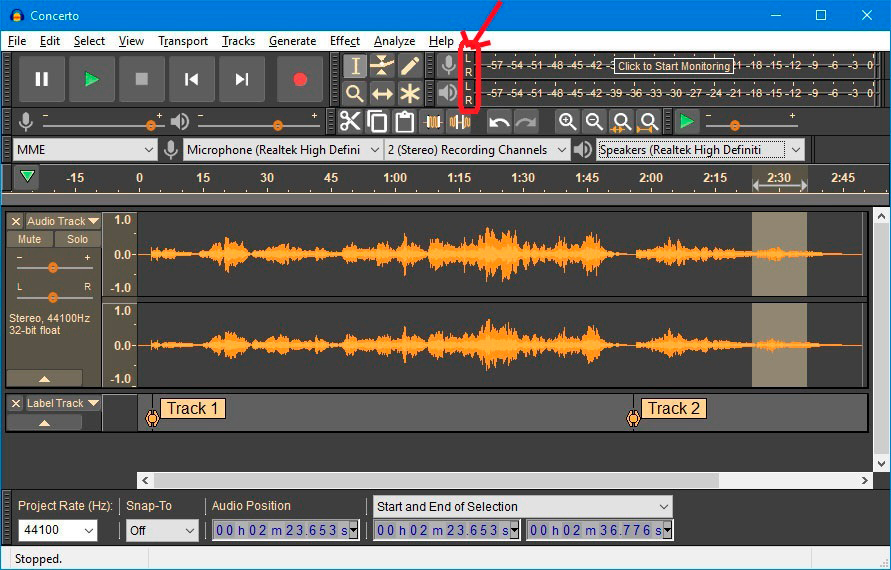
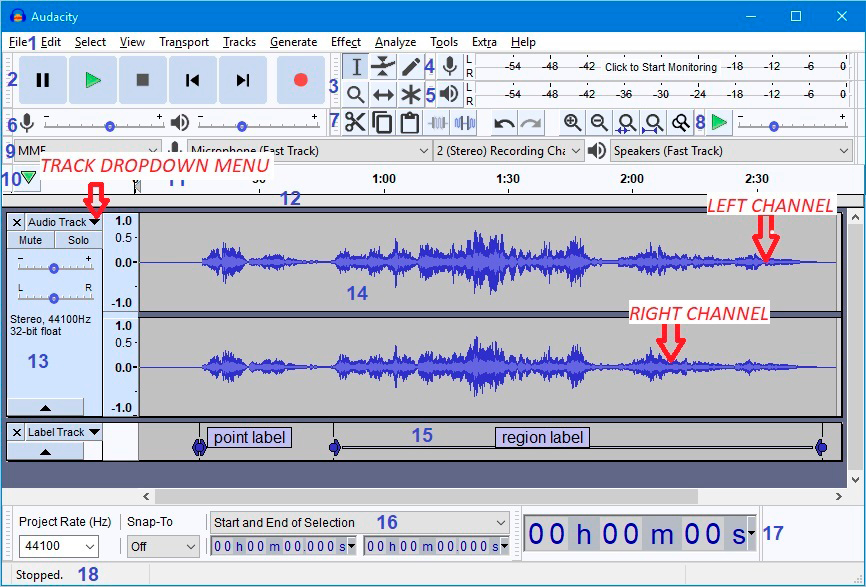
- Check to see if the signal is received without any problems. By pressing the arrow near the microphone icon and selecting the “Start monitoring” option, you can enter the “Monitoring” mode. The left and right stereo channel sensors (just above the microphone icon) must then react to your touch on the keyboard keys. Regulate the “Input signal” sensor if they don’t react and stay at 0 dB. In most cases, you’ll need to lower it in order for the signal to be detected.
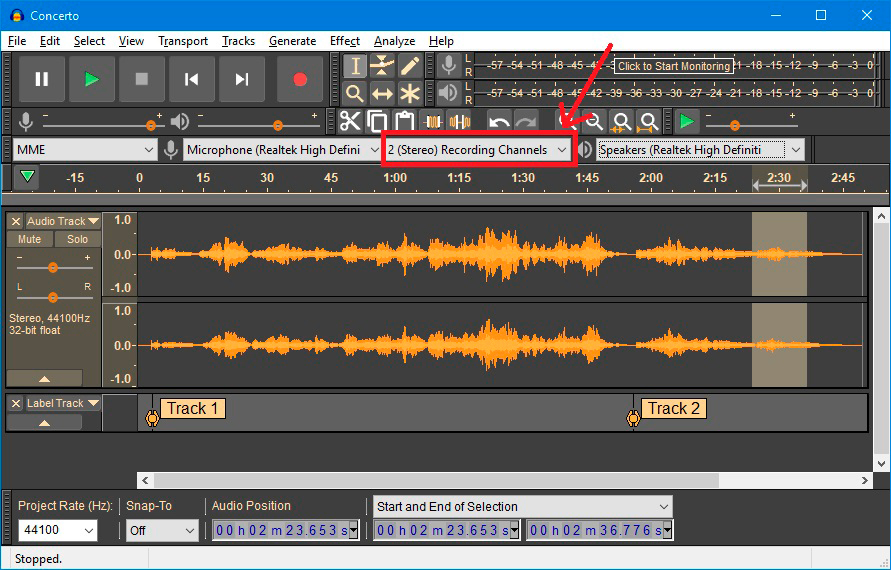
- Select “2 (stereo) Recording channels” from the Device toolbar, close to the microphone icon. Choose the “1 (Mono) Recording channel” if you want to record in mono.
- On the top panel, next to the playback controls, look for the “Record” button (the red circle). When you’re ready, press the button (or the “R” key on your PC keyboard) to begin playing. If there is a period of silence or unwanted sounds (for example, the occasional touch on the keys) recorded, you can cut it out later.

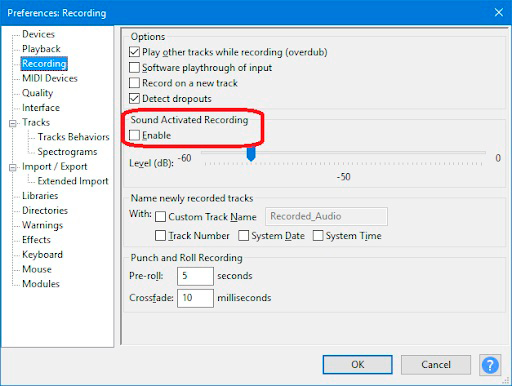
- You must go to the “Recording” menu in order for the recording to begin with the sound detected. Toggle the box for “Sound activated recording” in the “Preferences” section. As soon as you press any of the keys, the recording will begin. You can also set the initial sound volume to a minimum so that the recording doesn’t start until you press the keys as hard as specified.
- A small tip on how to use a MIDI keyboard with Audacity for recording. In the “Preferences” menu, you can also activate the “Overdub” option, and create a multi-track composition by playing other tracks while recording the one on your keyboard.
- During recording, you will see the left and right channel diagram in the center of the Audacity window. Through the “Track” dropdown menu, you can widen or represent this diagram in other ways, such as spectrum. To get there, click the track’s name (appears in the top control panel).
- To stop the recording, press the “Stop” button on the control panel. If you selected the sound-determined recording previously, the recording will stop when you stop playing.

Hi everyone! I’m Thomas Moody, also known as Guitarzan.